Key takeaways
- Using household chemicals: Bleach, window cleaner, acetone, strong degreasers, and alcohol-based products can discolor or dry the finish.
- Soaking the seat: Excess liquid can enter perforations, seams, foam, wiring, or seat sensors.
- Scrubbing with a magic eraser: Melamine foam is abrasive and can remove color or surface coating.
- Using a stiff brush: Choose soft bristles, especially on bolsters and coated leather.
- Cleaning in direct heat: Hot surfaces cause uneven drying and may worsen cracking.
- Ignoring the owner’s manual: Specialty finishes and integrated safety systems may have specific restrictions.
- Applying repair tape over grime: Clean and dry the area first, and use a patch only as a temporary measure.
- Over-conditioning: More product does not mean more protection; excess conditioner can leave residue and reduce grip.
Learning how to clean car leather without damage starts with using less water, less pressure, and the right product. Automotive leather is usually coated with a protective finish, but that finish can still become dull, sticky, cracked, or discolored when exposed to harsh household cleaners, soaking, heat, or aggressive scrubbing. Dirt trapped in seams can also act like sandpaper and accelerate wear.
The safest approach is gradual: vacuum loose grit, test products in a hidden area, clean one small section at a time, and wipe away residue before it dries. The process below works for most coated leather seats and many leather-trimmed door panels. Check your vehicle owner’s manual first, especially if the interior contains aniline leather, suede-like inserts, perforations, heating elements, or a factory-specific finish.
As an Amazon Associate we earn from qualifying purchases at no extra cost to you. Product prices and availability are accurate as of the date shown and are subject to change.
What You Need
| Item | Why | Optional? |
|---|---|---|
| Vacuum with a soft brush attachment | Removes sand, crumbs, and grit before they scratch the coating | No |
| Two to four clean microfiber towels | One for cleaning, one for rinsing, and one or two for drying | No |
| Leather cleaner labeled for automotive use | Breaks down body oils and dirt more safely than general-purpose cleaners | No |
| Leather conditioner or protectant | Helps maintain the surface after cleaning; use only if compatible with the finish | Yes |
| Soft detailing brush | Loosens dirt from stitching, piping, and textured grain | Yes |
| Distilled or clean lukewarm water | Provides controlled dampness and helps remove cleaner residue | Yes |
| Nitrile gloves | Protects your hands from cleaner and concentrated grime | Yes |
| Leather repair tape or patch | Temporary coverage for a small tear or exposed area; it is not a cleaning product | Yes |
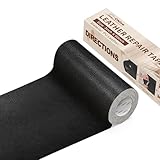
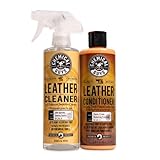
A basic automotive leather cleaner-and-conditioner kit typically costs about $20 to $35. For example, the Chemical Guys Leather Cleaner & Conditioner Kit, with two 16-ounce bottles, is listed at $27.99. A black ONine self-adhesive repair patch measures 3 by 60 inches and is listed at $7.98. A patch can protect a damaged spot while you arrange a proper repair, but applying it to dirty or oily leather can trap contamination underneath.
Step-by-Step
1. Identify the surface and inspect the damage (5 minutes)
Confirm whether the seat is leather, vinyl, synthetic leather, or a combination. Many vehicles use leather only on seating surfaces and vinyl on the sides or rear panels. Do not assume every dark, textured surface is leather.
Look for peeling, cracking, loose stitching, deep tears, color transfer, sticky areas, and perforated sections. If the finish is already flaking, aggressive cleaning can remove more of it. Photograph serious damage before starting, and avoid saturating seams or holes.
2. Work in a cool, shaded area (5 minutes)
Park indoors or in shade with the doors open if safe. The surface should be cool to the touch. Avoid cleaning in direct sun or when the seat is hot, because cleaner can dry unevenly and leave streaks. Do not use a hair dryer, heat gun, or high-powered heater to speed up drying.
3. Remove loose dirt with a vacuum (5 to 10 minutes)
Use a soft brush attachment and low, controlled suction around seams, piping, seat tracks, and perforations. Hold the nozzle slightly above fragile areas instead of dragging a hard plastic edge over them. A small detailing brush can loosen crumbs before they are vacuumed.
Do not skip this step. Wiping dry grit across a leather seat creates avoidable abrasion, particularly on bolsters where dust collects.
4. Test the cleaner in a hidden area (10 minutes)
Apply a small amount of the cleaner to a towel, not directly to the seat. Test beneath the seat, on a lower side panel, or in another inconspicuous location. Leave the area for several minutes, then wipe it dry and inspect it in good light.
Stop if the test area becomes lighter, darker, tacky, cloudy, or unusually shiny. A cleaner that is safe for one leather finish may not be safe for another. Never combine different cleaners, bleach, ammonia, alcohol, dish soap, or household disinfectants.
5. Clean one small section at a time (10 to 20 minutes per seat)
Lightly dampen a microfiber towel with cleaner. The towel should feel moist, not wet enough to drip. Gently wipe a section about 12 by 12 inches using short, overlapping passes. Let the product do the work; heavy pressure can polish the surface unevenly or wear the coating.
For textured grain and stitching, use a soft detailing brush with minimal pressure. Keep the brush moving and avoid flooding perforations. Do not scrub back and forth rapidly over a single mark. If a stain does not lift after two or three gentle passes, stop rather than escalating to a harsher chemical.
6. Remove residue with a separate damp towel (5 to 10 minutes)
Use a second microfiber towel, lightly dampened with clean water, to wipe each completed section. This helps remove cleaner residue that could otherwise leave a sticky film. Rinse or replace the towel when it becomes visibly dirty.
Keep moisture away from seat controls, electrical connectors, belt buckles, and gaps around heating or ventilation components. Never pour water directly onto the seat.
7. Dry thoroughly and check the result (10 to 20 minutes)
Blot the surface with a dry microfiber towel, then leave the doors open in a ventilated area for about 15 to 30 minutes. The exact time depends on humidity and how much moisture was used. The seat should feel dry rather than cool and damp before you apply anything else.
Inspect for remaining residue, streaks, or color changes. If necessary, repeat a gentle cleaning pass on that small area instead of applying more product to the entire seat.
8. Condition only when appropriate (5 to 10 minutes)
Some modern automotive leather has a matte protective coating and may not need frequent conditioning. If your owner’s manual permits it, apply a small amount of compatible conditioner to a towel and spread a thin, even layer. Avoid heavy application, which can create a greasy finish, attract dust, or make seating surfaces slippery.
Allow the conditioner to sit only for the time stated on its label, then buff away excess with a clean towel. Keep conditioner off steering wheels, pedals, shifter grips, and seat belts, where slickness can affect control.
Mistakes to Avoid
- Using household chemicals: Bleach, window cleaner, acetone, strong degreasers, and alcohol-based products can discolor or dry the finish.
- Soaking the seat: Excess liquid can enter perforations, seams, foam, wiring, or seat sensors.
- Scrubbing with a magic eraser: Melamine foam is abrasive and can remove color or surface coating.
- Using a stiff brush: Choose soft bristles, especially on bolsters and coated leather.
- Cleaning in direct heat: Hot surfaces cause uneven drying and may worsen cracking.
- Ignoring the owner’s manual: Specialty finishes and integrated safety systems may have specific restrictions.
- Applying repair tape over grime: Clean and dry the area first, and use a patch only as a temporary measure.
- Over-conditioning: More product does not mean more protection; excess conditioner can leave residue and reduce grip.
How Often
Vacuum seats and seams every one to two weeks if the car is used daily, or whenever visible grit appears. Perform a light surface cleaning about once a month for frequent drivers and every two to three months for lightly used vehicles. Clean spills promptly by blotting with a dry towel rather than rubbing them into the grain.
Condition only as directed for your specific leather finish, commonly every three to six months when recommended. Climate, sunlight, pets, children, and heavy denim or workwear may require more frequent cleaning. Regular shade or use of a windshield sunshade can also reduce drying and fading.
When to Call a Pro or Replace
Contact an automotive leather repair specialist for deep tears, separated seams, extensive peeling, major dye loss, burns, hardened leather, or damage near airbags and seat wiring. A professional can match color, replace panels, and determine whether the seat cover or foam needs attention.
Replacement is usually more practical when a large section has lost its coating, the foam is misshapen, the frame is damaged, or repair costs approach the price of a replacement seat cover. A self-adhesive patch can cover a small tear temporarily, but it will not restore structural strength or factory appearance.
FAQ
Can I use soap and water on car leather?
Use only a very mild, compatible product approved for automotive leather, and apply it sparingly to a towel. Ordinary dish soap can remove oils or leave residue, while excess water can enter seams and perforations. Always test first.
How do I remove blue-jean dye from a leather seat?
Address transfer early with an automotive leather cleaner and a soft microfiber towel. Use light passes and stop if the color does not improve. Deep transfer may require professional dye correction; aggressive scrubbing can make the spot more visible.
Can I clean perforated leather the same way?
Yes, but use much less liquid and do not spray directly onto the seat. Work across small areas, keep cleaner away from the holes, and blot thoroughly. If product enters the perforations, stop and allow the area to dry naturally.
Why does my leather feel sticky after cleaning?
Sticky leather usually has cleaner or conditioner residue, heat-related finish deterioration, or transferred body oils. Wipe the surface with a barely damp microfiber towel, dry it fully, and avoid adding more conditioner. If tackiness returns, have the finish evaluated by a professional.