Key takeaways
- Mounting too low: A camera below the mirror is easier to see and may block your view.
- Hiding the wire in an airbag path: Never trap cable across an airbag cover or pillar without knowing the vehicle’s deployment route.
- Leaving cable near the pedals: A loose loop can catch a foot or interfere with braking.
- Skipping the test recording: A powered-on screen does not prove the camera is saving usable video.
- Using the wrong memory card: Choose the capacity and speed class specified by the camera maker, and replace cards that produce errors.
- Hardwiring without low-voltage protection: Parking mode can drain a battery if the kit does not shut off at a safe voltage.
- Overtightening trim: Forcing panels can break clips and create rattles.
A discreet dash cam should record a clear view without becoming the first thing you notice through the windshield. Done badly, installation can leave a dangling cable, block your line of sight, interfere with an airbag, loosen trim, or create reflections at night. A poorly positioned camera may also record too much of the hood and too little of the road.
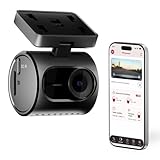
The goal is a clean, secure installation: place the camera behind the rearview mirror, route the power cable along existing trim, and leave no loose wiring near the driver’s hands or safety equipment. The same method works for compact front cameras such as the 70mai M310 Plus 4K, which is listed around $65–$75, and the Pioneer VREC-H120SC, generally around $60–$70. Always check your camera’s manual before connecting power or enabling parking mode.
As an Amazon Associate we earn from qualifying purchases at no extra cost to you. Product prices and availability are accurate as of the date shown and are subject to change.

What You Need
| Item | Why | Optional? |
|---|---|---|
| Dash cam and windshield mount | The camera, mounting pad, and recording hardware | No |
| 12-volt power cable or USB cable | Provides power while the vehicle is running | No |
| Trim-removal tool | Helps tuck the cable without scratching plastic or glass | Recommended |
| MicroSD card recommended by the camera maker | Stores video files and supports loop recording | No, unless the camera includes storage |
| Isopropyl alcohol and a lint-free cloth | Removes film and fingerprints before mounting | No |
| Adhesive cable clips | Secure excess cable away from the windshield and pedals | Optional |
| Fuse tap, crimp connectors, and a hardwire kit | Creates a cleaner connection and may enable parking mode | Optional |
| Plastic zip ties | Bundle slack behind trim or beneath the dashboard | Optional |
Budget approximately $65–$70 for a basic compact dash cam, plus $10–$30 for a memory card and roughly $20–$40 for a compatible hardwire kit if you want parking recording. Avoid routing wires with metal tools, and do not use a fuse larger than the vehicle or kit manufacturer specifies.
Step-by-Step
1. Choose the camera position — 5 minutes
Sit in the driver’s seat and look through the windshield as you normally would. Select a location behind or immediately beside the rearview mirror, preferably in the upper center portion of the glass. Keeping the camera within about 2–3 inches of the mirror’s edge usually makes it difficult to see from the driver’s position while preserving a wide view.
Do not place it in the area swept by the windshield wipers if that position leaves the lens looking through unclean glass. Avoid tint bands, defroster vents, inspection stickers, and any space marked for windshield sensors. Confirm that the camera does not block the driver’s view or interfere with a rain sensor or forward-facing safety camera.
2. Test the view before sticking anything down — 5 minutes
Connect the camera temporarily and turn on the live preview. Aim for a mostly level horizon. A small amount of hood at the bottom of the frame is acceptable, but the image should show traffic lights, lane markings, and enough sky to avoid a tunnel-like view.
Check the image from the driver’s seat and from outside the car. The camera should not sit directly in front of an airbag panel or hang below the mirror where it is conspicuous. If the mount uses adhesive, mark the chosen location with a small piece of removable tape on the glass.
3. Clean the mounting area — 3 minutes
Wipe the inside of the windshield with a clean, lint-free cloth. For greasy residue, use a small amount of isopropyl alcohol on the cloth—not directly on the camera or nearby electronics. Allow the glass to dry completely.
Adhesive mounts bond best when the glass and mounting pad are warm and clean. Do not install immediately after using a glass cleaner that leaves a polishing film. If the windshield is cold, wait until the cabin is comfortably warm rather than applying heat directly to the camera.
4. Attach and align the camera — 5 minutes
Remove the adhesive backing or attach the suction mount according to the instructions. Press firmly for the period specified by the manufacturer, then connect the camera and recheck the frame. Keep the lens free of fingerprints.
Leave enough room for the camera to be removed from its mount without pulling on the cable. If you use a suction cup, confirm that the locking tab is fully closed and that the rubber remains flat against the glass.
5. Route the cable across the headliner — 10 minutes
Start at the camera and tuck the cable into the gap between the windshield and the headliner using a plastic trim tool or your fingertips. Do not force the cable deep into the headliner. You need only enough slack to keep it from hanging into view.
At the side of the windshield, route the cable toward the door seal or the existing trim channel. This is the critical safety point: do not place wiring across an airbag cover or directly in front of an airbag deployment path. If the vehicle has a curtain airbag in the pillar, follow the factory wiring route or consult the vehicle service information. A professional is safer than guessing.
6. Hide the cable down the pillar and dashboard — 10 minutes
Continue along the door seal or behind removable trim, keeping the cable snug but not stretched. Leave a little slack near the camera and each trim corner so vibration does not pull on the connector. Use one or two adhesive clips inside the lower dashboard area if the cable wants to fall out.
Keep the cable away from the steering column, pedals, shifter, and sharp metal edges. Gather excess length beneath the passenger-side dashboard rather than stuffing a large bundle behind the pillar or headliner.
7. Connect power and check operation — 10 minutes
Plug the camera into the 12-volt outlet or USB power source. Start the vehicle and confirm that the camera powers on, records, and shuts down as expected. Format the memory card in the camera, if the manual recommends it, then make a short test recording.
Check the date, time, audio preference, loop-recording interval, and impact sensitivity. If the camera supports Wi-Fi or an app, use it to verify framing without repeatedly touching the mount. For parking mode, use a compatible hardwire kit with low-voltage protection. A basic outlet connection generally records only when that outlet is powered.
8. Inspect the finished installation — 5 minutes
Close every trim panel and open and close the doors to make sure the cable is not pinched. Sit in the driver’s seat again. You should see no loose wire, and the camera should not obstruct traffic signs or your view of the road.
Drive around the block and review the footage. Look for glare, excessive vibration, a crooked horizon, or windshield dirt directly in front of the lens. Make final adjustments only after parking safely.
Mistakes to Avoid
- Mounting too low: A camera below the mirror is easier to see and may block your view.
- Hiding the wire in an airbag path: Never trap cable across an airbag cover or pillar without knowing the vehicle’s deployment route.
- Leaving cable near the pedals: A loose loop can catch a foot or interfere with braking.
- Skipping the test recording: A powered-on screen does not prove the camera is saving usable video.
- Using the wrong memory card: Choose the capacity and speed class specified by the camera maker, and replace cards that produce errors.
- Hardwiring without low-voltage protection: Parking mode can drain a battery if the kit does not shut off at a safe voltage.
- Overtightening trim: Forcing panels can break clips and create rattles.
How Often
Inspect the mount and cable once a month, or whenever you clean the windshield. Wipe the lens with a dry microfiber cloth every few weeks and after dusty trips. Review a test clip every one to three months to confirm that the camera is recording, the time stamp is correct, and the memory card is not generating errors.
Format the card only after saving any footage you need. Replace it according to the manufacturer’s guidance or sooner if recordings become corrupted. Recheck the camera after a major temperature change, windshield replacement, or dashboard repair.
When to Call a Pro or Replace
Call an installer if your vehicle has complex driver-assistance sensors, a camera-integrated mirror, curtain airbags near the intended route, or no obvious safe path for the cable. Professional installation is also sensible when you want parking mode but are unfamiliar with fuse boxes and trim removal.
Replace the mount if it repeatedly falls, the adhesive has lifted, or the camera angle changes while driving. Replace the power cable if it becomes hot, cracked, pinched, or intermittently disconnects. A dash cam may need replacement when it freezes frequently, corrupts multiple known-good cards, shows a failing battery, or produces a permanently hazy image.
FAQ
Can a dash cam be completely hidden?
Usually, it can be made inconspicuous rather than invisible. Mounting it behind the rearview mirror and routing the cable through factory trim keeps the camera out of the driver’s main sightline without compromising the lens view.
Is it safe to tuck the cable into the headliner?
A small section can usually be tucked along the windshield edge, but do not push wiring across an airbag or deep into the headliner. Follow the vehicle’s approved routing or have an installer handle that section.
Should I use a hardwire kit for parking mode?
Use one only if the camera supports parking mode and the kit is compatible with your vehicle. Choose a kit with low-voltage battery protection and have the connection professionally installed if you are unsure which fuse is switched or constant power.
How much windshield space does installation require?
Most compact front cameras need only a small upper-windshield area, often about 2–4 inches across depending on the mount. Measure the camera and mount together, then confirm that the complete assembly stays outside restricted visibility zones.