Key takeaways
- Wash with a dedicated car shampoo, not dish soap, which strips wax.
- Work in the shade on a cool panel; heat makes products flash off too fast.
- Dry the area so you can clearly see the tar and sap spots.
What's inside
Road tar, tree sap, and bug splatter are more than eyesores, left alone, they bond to your clear coat, etch the paint, and become far harder to remove. The good news is that with the right product and a gentle technique, you can lift these contaminants safely at home without damaging the finish or resorting to harsh scrubbing that leaves swirl marks.
This 2026 guide explains how to remove tar and sap from your car’s paint step by step, along with proven product options like dedicated tar removers and sap removers, so you can restore a smooth, clean finish and protect your paint for the long haul.
As an Amazon Associate we earn from qualifying purchases.



⚡ Save on Your Next PC — Amazon Prime
Prime members get fast free shipping on the systems above, plus early access to Prime Day & Black Friday PC deals. New members get a 30-day free trial.
Watch: How to Remove Tar and Sap from Your Car’s Paint — Video Review
Wash the Car First
Never attack tar or sap on a dirty panel. Grit trapped on the surface will grind into the clear coat the moment you start wiping. Give the car a thorough wash with a proper automotive soap, then dry it, so you are working on a clean surface where the only things left to tackle are the bonded contaminants themselves.
- Wash with a dedicated car shampoo, not dish soap, which strips wax.
- Work in the shade on a cool panel; heat makes products flash off too fast.
- Dry the area so you can clearly see the tar and sap spots.
Choose the Right Remover
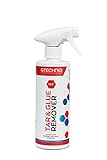
Match the product to the contaminant. For road tar, asphalt, and grime, a dedicated tar remover like a clear-coat-safe Tarminator or a road grime and tar remover breaks the bond quickly. For sticky tree sap, a purpose-made sap remover or an all-in-one sap-and-tar solvent such as a “sap attack” formula dissolves the residue without aggressive rubbing. Many bug-and-tar removers handle both plus insect splatter in one pass.
Apply, Dwell, and Wipe Gently
Technique matters as much as the product. Spray or dab the remover onto the affected area and let it dwell for the time the label recommends, this dwell time does the work so you do not have to scrub. Then wipe gently with a clean microfiber towel, using light pressure and a fresh section of cloth as it picks up residue. Stubborn spots may need a second application rather than harder rubbing.
- Let the product dwell; do not wipe immediately.
- Use a soft microfiber towel and light pressure to avoid marring.
- Reapply for tough spots instead of scrubbing aggressively.
Rewash and Protect the Paint
Solvent-based removers strip wax and can leave a residue, so once the tar and sap are gone, wash the treated area again to remove any leftover product. Finish by reapplying a wax or sealant to the bare spots you cleaned, restoring protection and helping future contaminants bond less aggressively, which makes the next cleanup far easier.
Tips
- Remove tar and sap promptly, fresh contaminants lift far more easily than baked-on ones.
- Always test the remover on a small, inconspicuous area first.
- Keep dedicated microfiber towels for tar and sap so you do not spread residue.
- Reapply wax or sealant after using any solvent-based remover.
Frequently Asked Questions
Will tar remover damage my clear coat?
Reputable, clear-coat-safe tar removers will not harm the finish when used as directed. Always follow the label’s dwell time and avoid aggressive scrubbing.
Can I use household products instead?
Some people try oils or solvents, but these can be inconsistent or harsh on paint. A dedicated automotive tar or sap remover is safer and far more effective.
How do I remove sap without scratching?
Let a sap remover dwell to soften the residue, then wipe gently with microfiber. The product should do the work, so never scrape or scrub hard.
Do I need to wax after removing tar and sap?
Yes. Solvent removers strip existing wax, so reapply a wax or sealant to the cleaned areas to restore protection and ease future cleanups.
Conclusion
Removing tar and sap is straightforward when you wash first, pick the right dedicated remover, let it dwell, and wipe gently with microfiber. Finish by rewashing and re-protecting the paint, and address contaminants promptly for the easiest results. With these steps your car’s finish stays smooth, clean, and well protected all year.