Key takeaways
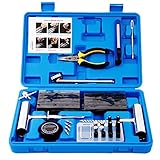
- Trim removal tools: A plastic pry set prevents scratched panels when you lift door sills.
- Wire strippers and connectors: Posi-Tap connectors let you tap the reverse-light wire without cutting.
- A multimeter: Confirms which wire goes hot only when you shift into reverse.
- A drill (wired kits only): Needed if your camera mounts through the license-plate housing.
What's inside
A backup camera turns the guesswork of reversing into a clear, top-down view of exactly what sits behind your bumper. Since 2018, every new car sold in the U.S. has shipped with one, but if your vehicle predates that rule, a DIY kit closes the gap for well under $100. In 2026 the aftermarket has matured to the point where a solid plug-and-play camera runs $30 to $50, and a wireless magnetic unit that skips cabin wiring entirely sits around $110.
This guide walks through both wired and wireless installs, the tools you actually need, and the shortcuts that save an afternoon. Whether you lean toward a budget option like the HD 1080P Backup Camera for Cars or a premium solar unit like the AUTO-VOX Solar Wireless Backup Camera, the fundamentals are the same: mount the camera, route the signal, and tap reverse power.
As an Amazon Associate we earn from qualifying purchases.


⚡ Save on Your Next PC — Amazon Prime
Prime members get fast free shipping on the systems above, plus early access to Prime Day & Black Friday PC deals. New members get a 30-day free trial.
Watch: How to Install a Backup Camera on Your Car — Video Review
Choosing Between Wired and Wireless
Wired cameras give you the most reliable image with zero latency, which matters when you are inching toward a trailer hitch. They require running a video cable from the rear to the dash, usually along the door sills under the trim. Kits like the YIMU Backup Camera System include DIY guide lines and a license-plate mount that hides most of the hardware.
Wireless kits, such as the 1080P HD Wireless Backup Camera with its one-minute magnetic mount, transmit over a 2.4GHz link and only need power at each end. They install in a fraction of the time but can show brief signal stutter in areas with heavy radio interference. For most commuters the tradeoff is worth it.
Tools and Prep You Need
- Trim removal tools: A plastic pry set prevents scratched panels when you lift door sills.
- Wire strippers and connectors: Posi-Tap connectors let you tap the reverse-light wire without cutting.
- A multimeter: Confirms which wire goes hot only when you shift into reverse.
- A drill (wired kits only): Needed if your camera mounts through the license-plate housing.
Mounting the Camera
The license-plate frame is the most forgiving location because it centers the lens and hides wiring behind the plate. Position the camera so the lens tilts down roughly 30 to 45 degrees, giving you a view that includes your bumper as a reference edge. A 15-Minute Easy to Install Backup Camera typically clips right into a plate screw, so you rarely need to drill.
Wiring to Reverse Power
Both wired and wireless cameras draw power from the reverse-light circuit so the display only activates in reverse. Pop the trunk or tailgate trim, find the reverse bulb harness, and use a multimeter to identify the wire that reads roughly 12 volts only when the car is in reverse. Tap the camera’s red wire there and ground the black wire to bare metal. The USB Plug and Play style cameras simplify this even further by drawing from a cabin port.
Connecting the Display
For dedicated monitors like the HD 1080P 7 Inch Wireless Backup Camera for Truck, mount the screen on the dash or windshield and run its power lead to a fuse tap or the cigarette outlet. Pair it with the transmitter, shift into reverse, and confirm the image is centered and level before you tidy the wiring.
Tips
- Test the full system before you reinstall any trim panels, so you are not undoing work later.
- Leave a small service loop of cable at the camera so it can flex without straining connectors.
- Aim the lens slightly lower than feels natural; the extra bumper reference improves depth judgment.
- Use dielectric grease on outdoor connectors to stop corrosion during winter road-salt season.
Frequently Asked Questions
How long does a backup camera install take?
A wireless magnetic kit can be running in 15 to 30 minutes. A fully hidden wired install with cable routed under the trim typically takes one to two hours for a first-timer.
Do I need a separate monitor?
Only if your car lacks a compatible head unit. Many kits include their own 5- to 7-inch display, while some can feed an existing aftermarket stereo through an RCA input.
Will a wireless camera lag?
Modern 2.4GHz and 5GHz kits show latency under a fifth of a second in normal conditions, which is imperceptible at reversing speeds. Interference near strong radio sources can cause occasional flicker.
Can I install one without drilling?
Yes. License-plate-mount and magnetic cameras attach using existing plate screws or a metal surface, so drilling is only required for flush-mount bumper installs.
Conclusion
Adding a backup camera is one of the highest-value DIY upgrades you can make, improving safety for around the cost of a tank of gas plus a lunch. Pick wired if you want the cleanest image and are comfortable routing cable, or wireless if you value a fast, tidy install. Either way, aim the lens low, power it from the reverse circuit, and test before you close everything up.