Key takeaways
- Always test any cleaner on a hidden section first, especially on light or perforated leather.
- Never let cleaner pool in perforations; use a damp cloth, not a soaking spray, on ventilated seats.
- Work in the shade so products do not flash-dry on hot leather and streak.
- Condition more often if you park in direct sun, since UV is the main cause of cracking and fade.
What's inside
Leather seats are a genuine luxury, but they are also a material that dries, cracks, and fades if you ignore them. The oils that keep leather supple evaporate under sun and heat, and everyday body oils, denim dye, and spilled coffee accelerate the damage. The good news is that a proper clean-and-condition routine, done just two to four times a year, keeps leather soft, protected, and looking new for the life of the car.
This guide walks through the correct two-step process, cleaning first, then conditioning, and highlights the products that make it easy. Skip either step and you either grind dirt into the grain or seal in grime, so understanding the sequence is the key to doing it right.
As an Amazon Associate we earn from qualifying purchases.


⚡ Save on Your Next PC — Amazon Prime
Prime members get fast free shipping on the systems above, plus early access to Prime Day & Black Friday PC deals. New members get a 30-day free trial.
Watch: How to Clean and Condition Leather Car Seats Effectively — Video Review
Why Two Steps Matter
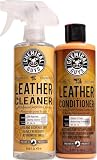
Cleaning and conditioning are separate jobs. A leather cleaner lifts dirt, oils, and stains out of the grain, while a conditioner replaces lost moisture and adds UV protection. Conditioning over dirty leather traps grime against the surface, and cleaning without conditioning leaves the leather dry. A combined kit such as the Chemical Guys Leather Cleaner and Conditioner Kit gives you both steps in matched formulas.
Step One: Cleaning the Leather
Start by vacuuming crumbs and grit from seams and seat bases. Spray a dedicated cleaner like Armor All Car Leather Cleaner Spray with Beeswax onto a microfiber cloth rather than directly onto the seat, then work in small sections. For ground-in stains, a soft brush and a stronger interior cleaner such as CAR GUYS Interior Car Cleaner lifts denim transfer and scuffs. Wipe away residue with a clean damp cloth before moving on.
Step Two: Conditioning and Protecting
Once the leather is clean and dry, apply conditioner to restore softness and shield against UV. A spray-and-wipe product like the Chemical Guys Sprayable Leather Cleaner and Conditioner makes this quick, or use dedicated wipes such as Meguiar’s Gold Class Rich Leather Wipes for a mess-free touch-up. Work it in evenly, let it absorb for a few minutes, then buff off any excess so the seats are not slippery.
Maintenance Between Deep Cleans
For upkeep, keep a pack of Armor All Car Leather Wipes or Air Jungles 3-in-1 Leather Cleaner Wipes in the door pocket for quick spills. A ten-second wipe after a coffee splash prevents staining and means your quarterly deep clean is far easier. Regular light care beats occasional heavy scrubbing every time.
Tips
- Always test any cleaner on a hidden section first, especially on light or perforated leather.
- Never let cleaner pool in perforations; use a damp cloth, not a soaking spray, on ventilated seats.
- Work in the shade so products do not flash-dry on hot leather and streak.
- Condition more often if you park in direct sun, since UV is the main cause of cracking and fade.
Frequently Asked Questions
How often should I condition my leather seats?
Two to four times a year is right for most drivers, and more often if your car sits in strong sun. Between conditioning sessions, wipe up spills promptly to protect the finish.
Can I use household cleaners on car leather?
Avoid all-purpose and ammonia-based cleaners; they strip natural oils and can crack the leather. Use a product formulated for automotive leather, which cleans gently and preserves the protective finish.
Do I really need separate cleaner and conditioner?
For best results, yes. Cleaning removes grime and conditioning restores moisture, and they do different jobs. Combo kits pair the two, but skipping the conditioning step will leave leather dry over time.
Will conditioner make my seats slippery?
Only if you over-apply and skip buffing. Apply a thin, even coat, let it absorb, then buff off the excess with a clean microfiber, and the seats will feel supple rather than greasy.
Conclusion
Keeping leather seats looking new is simple once you follow the sequence: vacuum, clean, then condition. Reach for a matched kit like the Chemical Guys cleaner and conditioner for deep cleans, keep Armor All or Meguiar’s wipes handy for quick touch-ups, and stay ahead of UV with regular conditioning. A few sessions a year is all it takes to protect one of your car’s most valuable surfaces.